How to Layer Liquid Highlighter with Setting Spray for an All-Day Glass Skin Glow

By MORPHE | Published: 2026-06-30
Category: How-to Guides
Master the art of layering liquid highlighter with setting spray to achieve a long-lasting, dewy glass skin finish. Expert tips, product picks, and step-by-step guide included.
Achieving that coveted glass skin glow isn't just about the products you use—it's about how you layer them. When you combine a liquid highlighter with a setting spray, you create a luminous, skin-like finish that lasts all day without looking greasy. Whether you're heading to a daytime event or a night out, mastering this technique can elevate your makeup routine. In this guide, we'll walk you through the best methods to layer these two products for a radiant, dewy finish that stays put.
Why Layering Liquid Highlighter with Setting Spray Works
Liquid highlighters are designed to give a natural, lit-from-within glow, but they can sometimes fade or shift on oily skin. Setting sprays not only lock in your makeup but also help melt the highlighter into the skin, creating a seamless, second-skin effect. When applied correctly, this duo delivers a dewy finish that lasts for hours without the need for constant touch-ups.
The Science Behind the Glow
Most liquid highlighters contain light-reflecting particles suspended in a water- or silicone-based formula. Setting sprays often include film-forming polymers that create a flexible layer over your makeup, preventing the highlighter from settling into fine lines or fading. By layering them, you essentially "sandwich" the glow between your base makeup and a protective barrier, ensuring your glass skin remains intact.
Step 1: Prep Your Skin for Maximum Radiance
Before you even think about highlighter, your skin needs to be well-hydrated and primed. Use a moisturizer that suits your skin type, followed by a hydrating primer. This ensures the liquid highlighter glides on smoothly and doesn't cling to dry patches. For an extra boost, try a glow-enhancing primer that already has light-reflecting particles.
Step 2: Apply Your Base Makeup
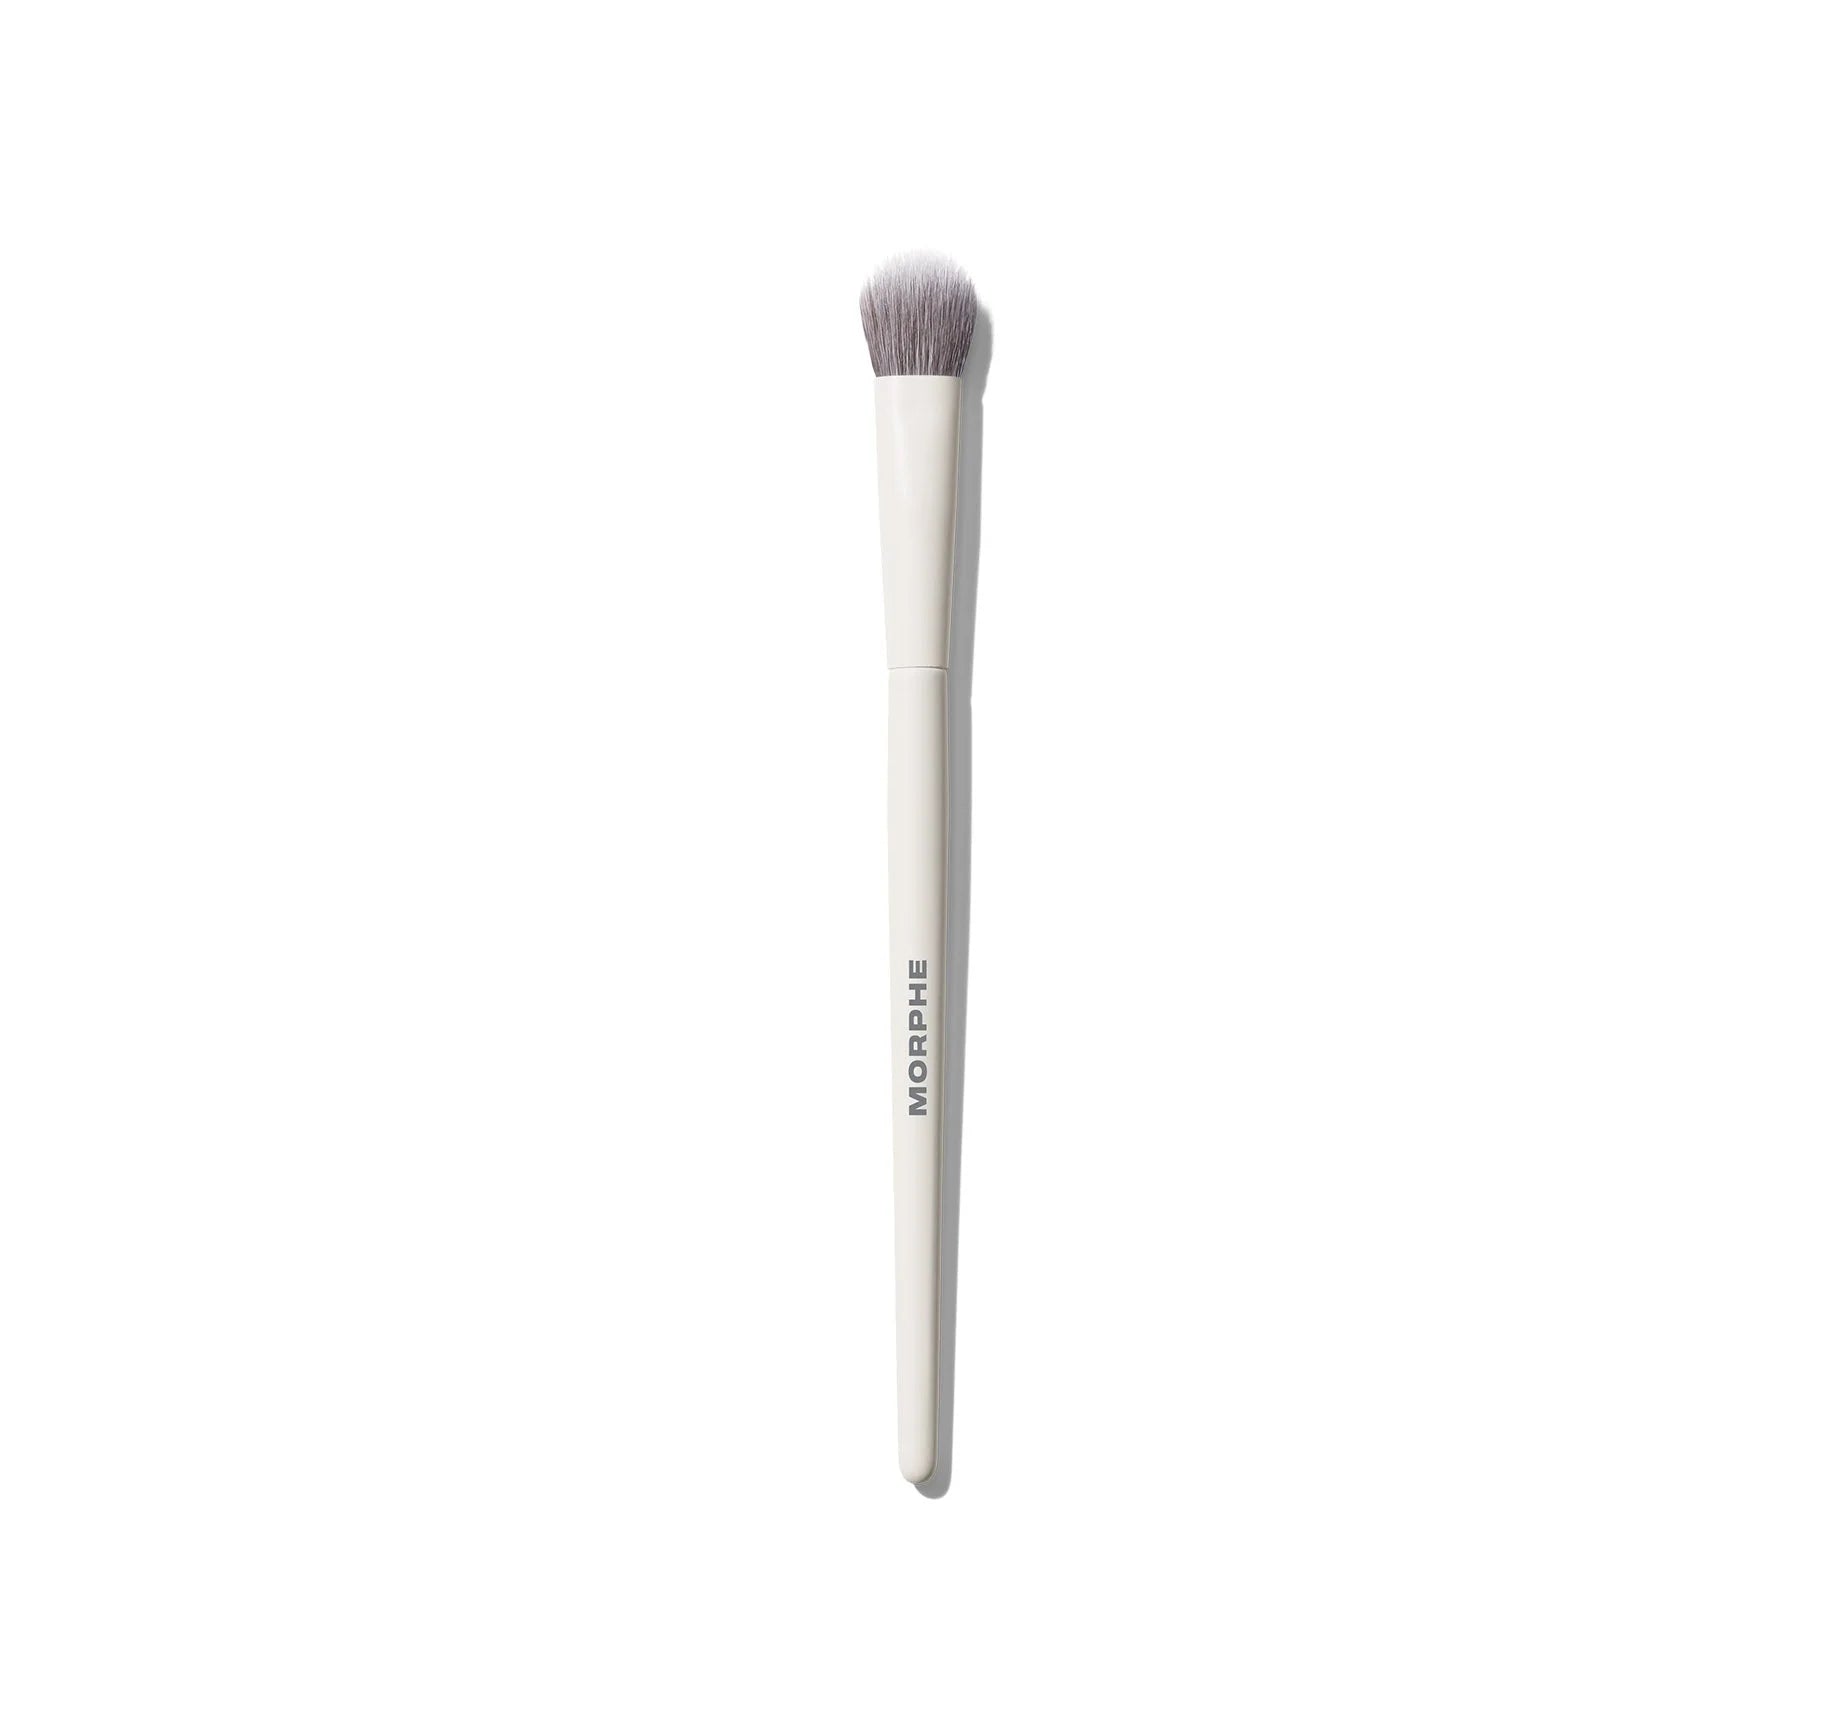
Start with a lightweight foundation or tinted moisturizer, focusing on even coverage. Then, apply concealer where needed—like under the eyes or on blemishes. A flawless base is crucial for the highlighter application to look natural. For precision, use a brush like the M131 Rounded Paddle Concealer Brush to blend concealer seamlessly. This brush's flat, rounded tip allows you to buff product into the skin without streaks, creating a perfect canvas for your glow.
Step 3: Apply Liquid Highlighter Strategically
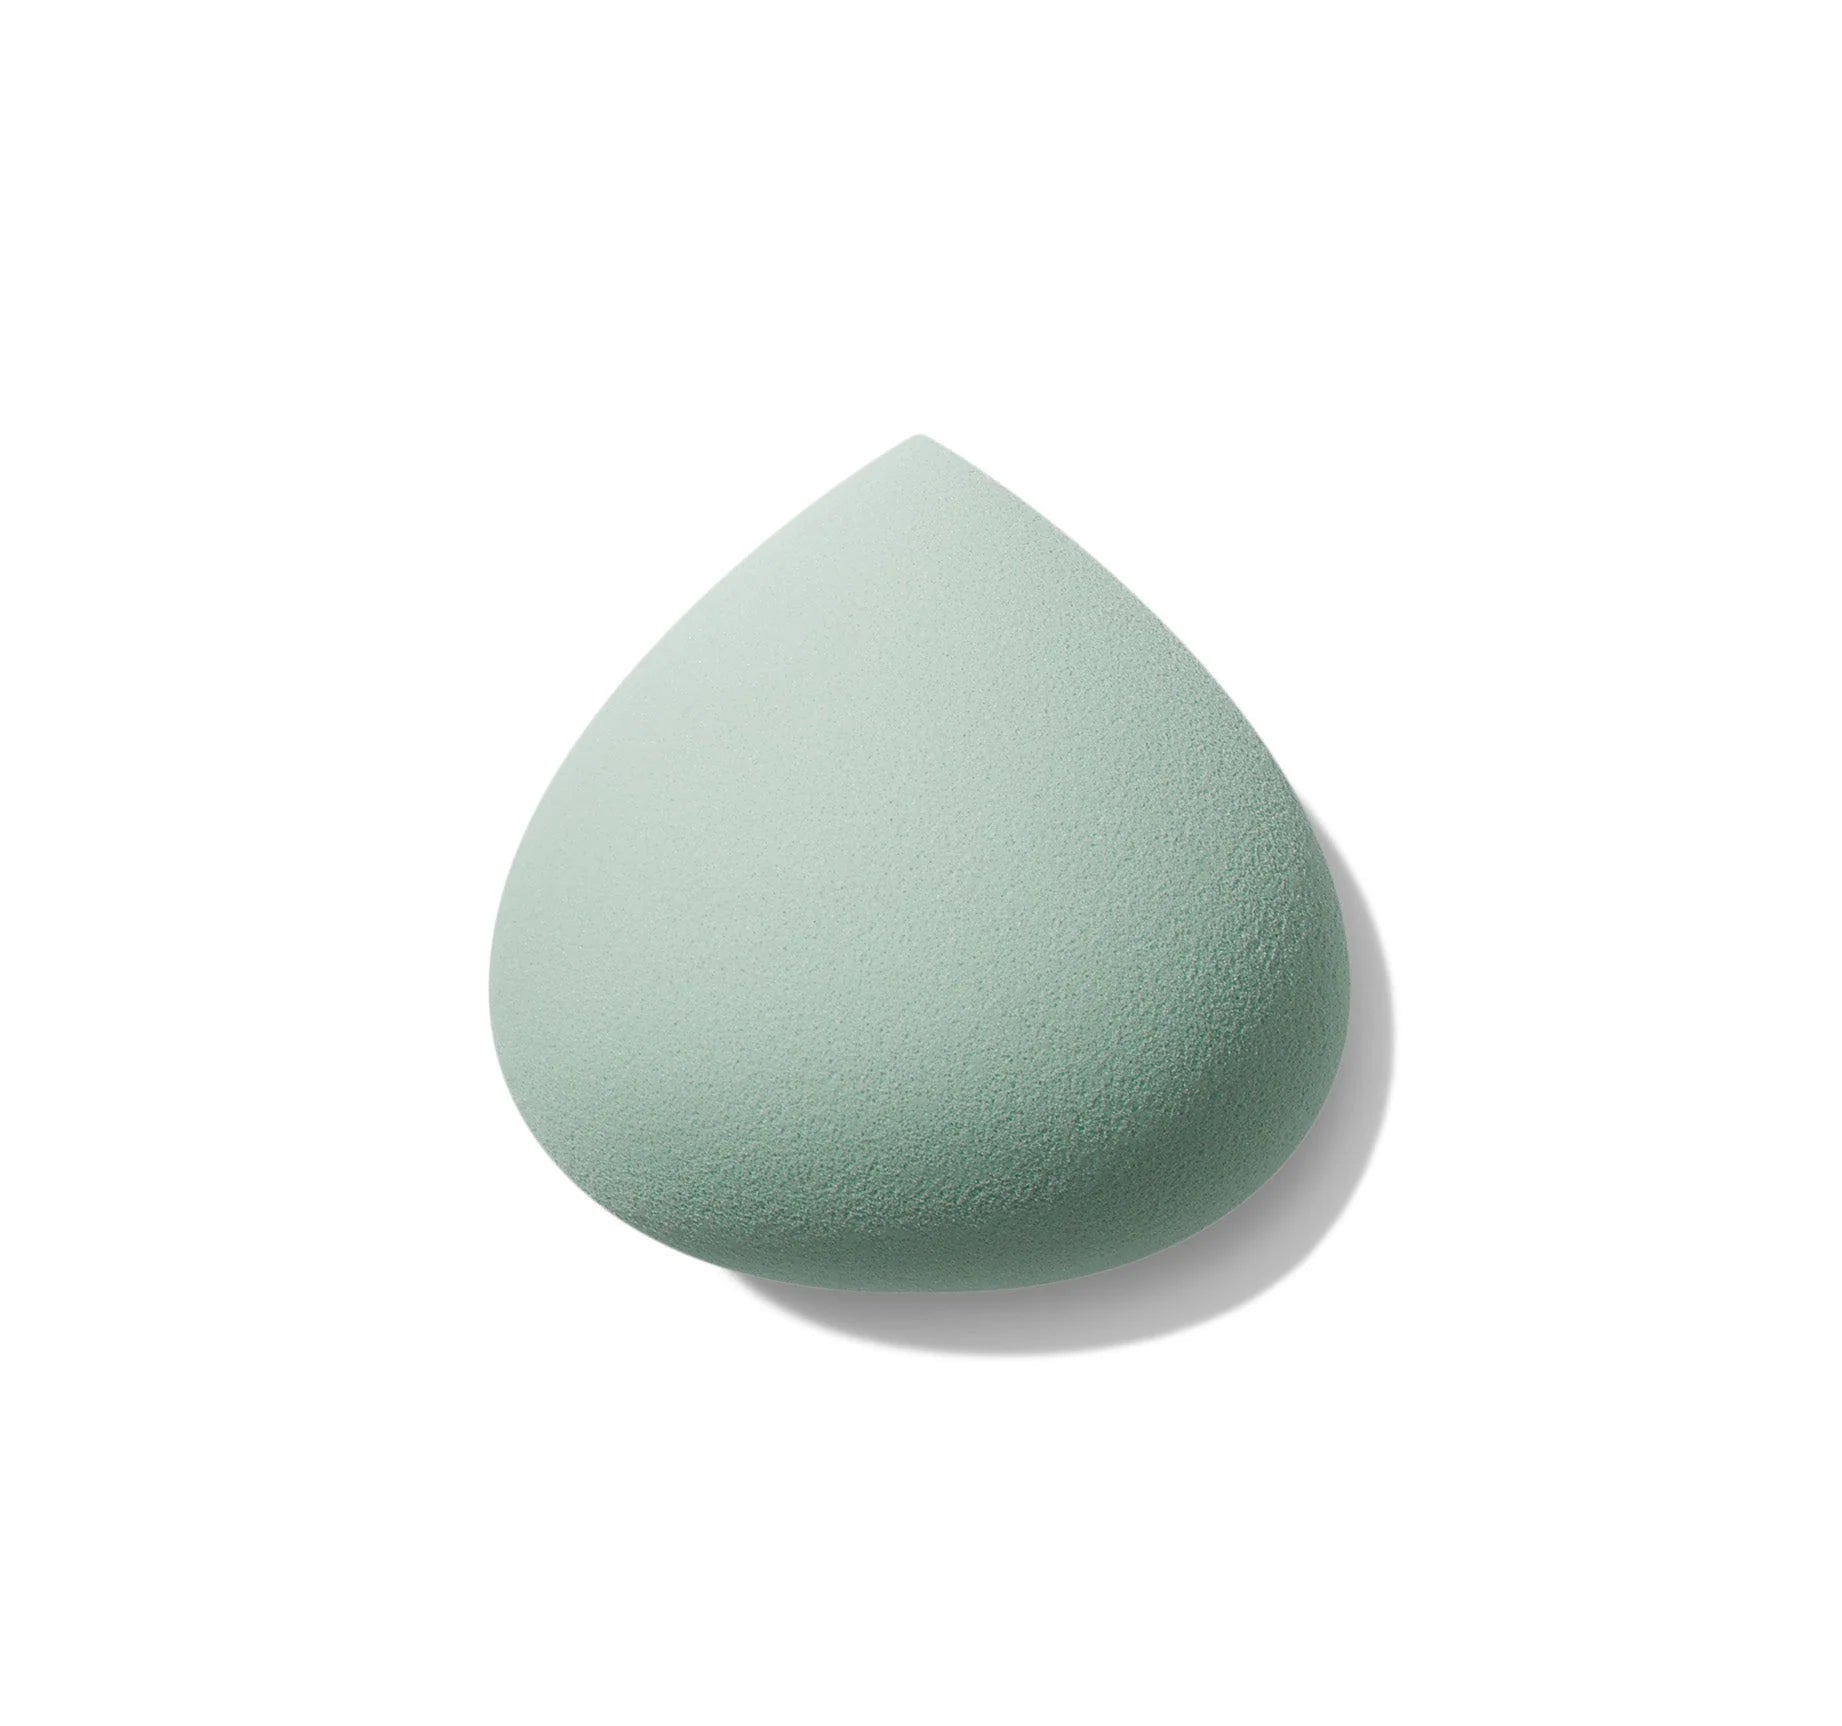
Instead of applying highlighter all over your face, focus on the high points where light naturally hits: the tops of your cheekbones, the bridge of your nose, your cupid's bow, and just above your brow arch. Use a small amount of product—you can always build it up. For a more diffused look, use a damp beauty sponge to pat the highlighter into the skin. The All Covered Shapable Makeup Sponge is perfect for this step; its unique shape allows you to reach small areas and blend the product without absorbing too much.
Pro Tip: Mix Highlighter with Foundation
For an all-over glow, mix a drop of liquid highlighter with your foundation before applying. This creates a luminous base that looks natural under any lighting. Just be careful not to overdo it—one drop is enough for your entire face.
Step 4: Set with Powder (Optional)
If you have oily skin or want to ensure extra longevity, lightly dust a translucent powder over your T-zone and under your eyes. Avoid powdering where you applied highlighter to preserve the glow. For drier skin types, skip this step entirely to maintain the dewy finish.
Step 5: Lock It In with Setting Spray
Now comes the key step. Hold your setting spray about 8–10 inches from your face and mist it in an "X" and "T" pattern to ensure even coverage. The setting spray will blend the highlighter particles into your skin, eliminating any harsh lines and creating a cohesive, glass-like finish. Wait for it to dry naturally—don't fan your face, as this can disturb the layer. For best results, choose a setting spray with a dewy or natural finish, not matte.
Step 6: Reapply Highlighter for Extra Intensity (Optional)
If you want a more intense glow for evening events, you can layer a second coat of liquid highlighter after the setting spray has dried. This creates a multi-dimensional effect that catches the light beautifully. Just use a light hand and blend quickly.
Best Practices for Long-Lasting Glass Skin
- Choose compatible formulas: Use a water-based setting spray with a water-based liquid highlighter to avoid pilling. Check the ingredients list if unsure.
- Don't over-apply: Less is more with liquid highlighter. Start with a small amount and build up gradually.
- Use the right tools: A sponge or a stippling brush works best for blending liquid highlighter without disturbing your base makeup.
- Mist from a distance: Holding the setting spray too close can cause droplets to concentrate in one area, leading to a wet look rather than a glow.
- Touch-ups: If your glow fades during the day, mist a little setting spray on a damp sponge and gently pat the highlighter areas to revive the shine.
Common Mistakes to Avoid
| Mistake | Why It Happens | Fix |
|---|---|---|
| Greasiness | Too much product or wrong skin prep | Use less highlighter and blot excess oil before applying |
| Highlighter fading | Setting spray not applied evenly or too matte | Choose a dewy setting spray and mist in a cross pattern |
| Streaky application | Using fingertips or a dry brush | Use a damp sponge or a soft synthetic brush |
| Patchiness | Highlighter applied over dry skin | Exfoliate and moisturize before makeup |
Recommended Products for the Ultimate Glow
While technique is key, using the right products makes a world of difference. For a hydrated, radiant base, consider the Cloudskin Duo, which combines a moisturizing primer and setting mist to prep and lock in your glow. If you prefer a more targeted highlight, the Shapelifter Micro Contour Stick offers precision contouring and highlighting in one, perfect for creating dimension. And for an all-over luminous look, the Ultimate Glow Trio provides three complementary shades to mix and match.
Final Thoughts
Layering liquid highlighter with setting spray is an art, but with the right steps and tools, anyone can achieve that enviable glass skin glow. Remember to prep your skin, apply strategically, and lock it in with a quality setting spray. Experiment with different intensities and find what works best for your skin type and occasion.
Ready to perfect your glow? Explore the Ultimate Glow Trio for a versatile range of luminous shades that layer beautifully under any setting spray. Your glass skin journey starts here.