Master Face Sculpting: How to Use a Flat Contour Brush for Precise Definition

By MORPHE | Published: 2026-06-24
Category: How-to Guides
Learn expert techniques for using a flat contour brush to sculpt and define your face with precision. Tips for cream, powder, and liquid formulas, plus product recommendations.
Contouring has evolved from a dramatic, full-face transformation into a subtle art of enhancing your natural bone structure. At the heart of this technique lies one essential tool: the flat contour brush. Unlike fluffy blending brushes or angled powder brushes, a flat contour brush is designed for precision—creating sharp, clean lines that define cheekbones, slim the nose, and shape the jawline. Whether you are a makeup novice or a seasoned artist, mastering the flat contour brush can elevate your sculpting game. In this guide, we will explore how to choose the right brush, apply different formulas, and avoid common mistakes. Plus, we will highlight some must-have products from MORPHE to help you achieve a flawless finish.
What Is a Flat Contour Brush and Why Do You Need One?
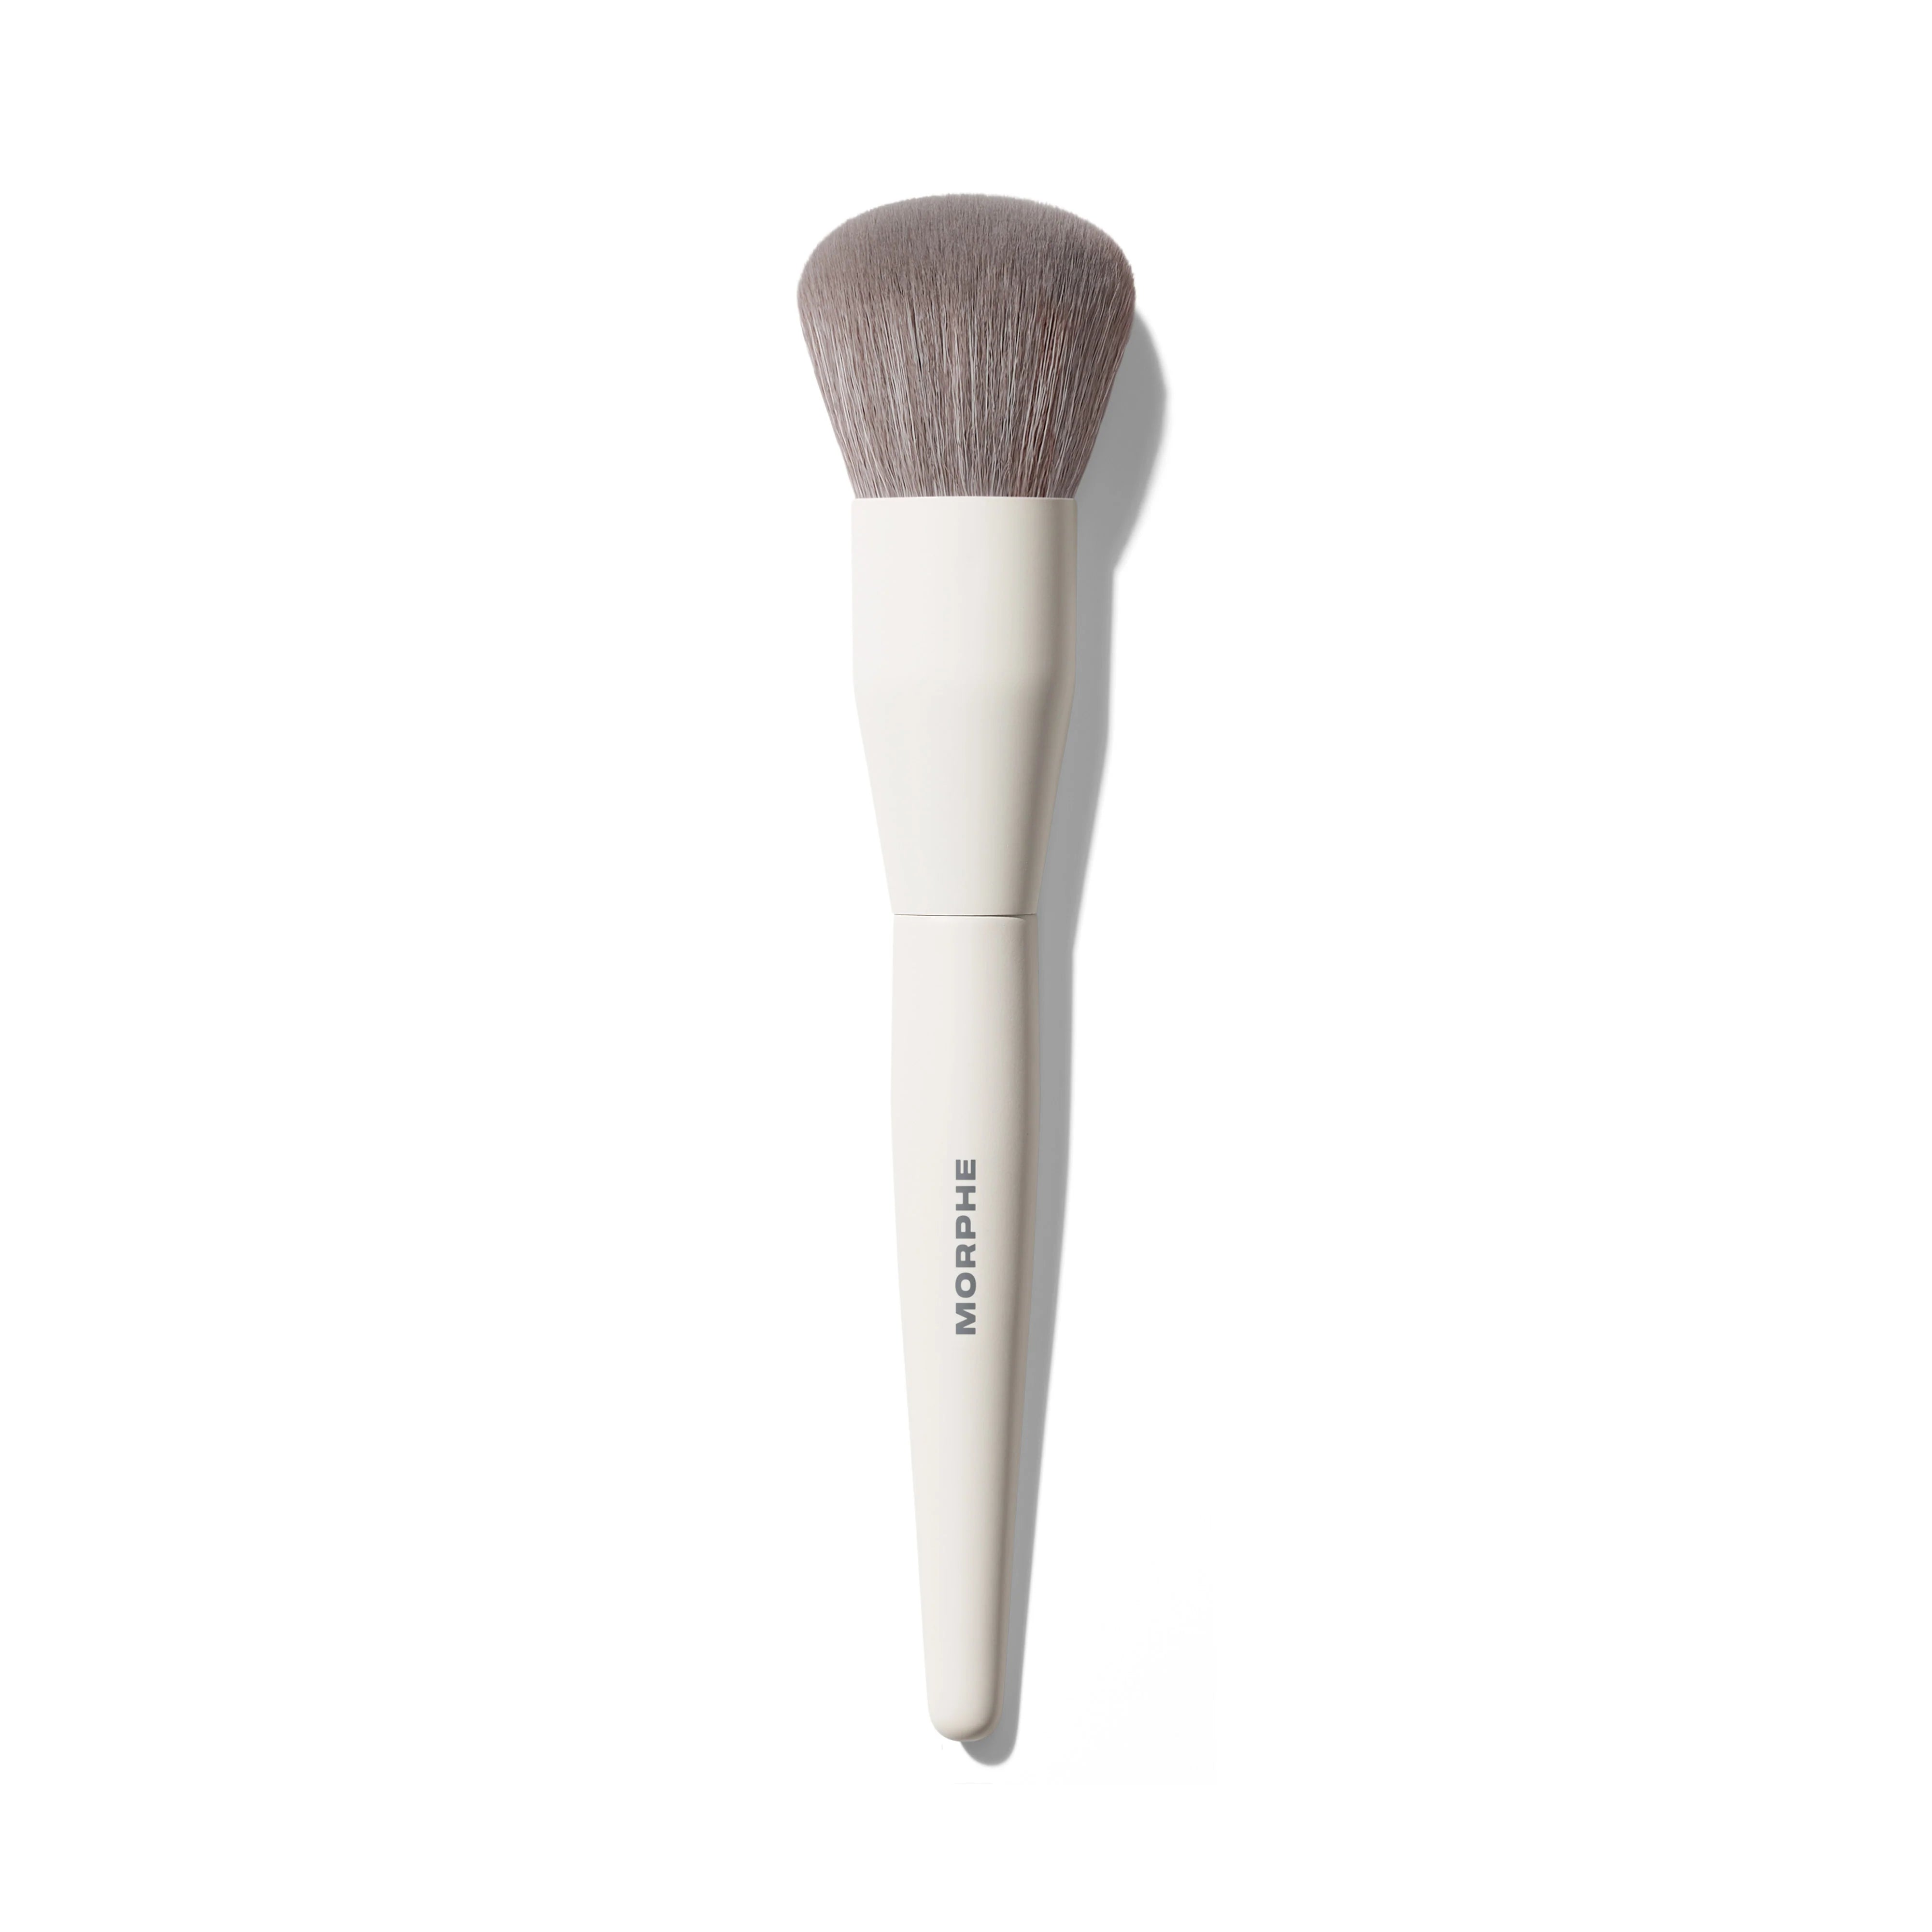
A flat contour brush typically features densely packed, synthetic bristles cut into a flat, slightly tapered shape. This design allows for precise placement of product—whether cream, powder, or liquid—without spreading it too far. Unlike a fluffy brush that diffuses color, a flat brush lays down a concentrated stripe of pigment, giving you control over the intensity and placement of your contour. For anyone aiming for chiseled cheekbones or a defined jawline, this brush is a non-negotiable tool in your kit.
Key Benefits of Using a Flat Contour Brush
- Precision: The flat shape targets specific areas like the hollows of the cheeks, sides of the nose, and temples.
- Control: Dense bristles pick up the right amount of product and deposit it exactly where you want.
- Versatility: Works seamlessly with cream, powder, and liquid contour formulas.
- Blendability: Although flat, the brush can be used to blend edges when used with a light hand or paired with a blending brush.
Choosing the Right Flat Contour Brush for Your Formula
Not all flat contour brushes are created equal. The bristle density, shape, and length affect how the brush performs with different product textures. Here is a quick breakdown:
| Formula Type | Ideal Brush Characteristics | Best Technique |
|---|---|---|
| Cream Contour | Dense, synthetic bristles (like those in the Ready, Set, Pro 16-Piece Face & Eye Brush Set), slightly flexible to pick up cream without absorbing it | Stipple or tap product onto skin, then blend outward with a damp sponge or fluffy brush |
| Powder Contour | Firm, flat, and slightly tapered bristles that pick up powder evenly | Swipe along the hollows of cheeks, then lightly buff edges with a clean brush |
| Liquid Contour | Synthetic, dense, and flat; often angled to fit under cheekbones | Draw a thin line, then blend immediately with a stippling motion |
Step-by-Step: How to Use a Flat Contour Brush for Face Sculpting
Follow these steps to achieve precise, natural-looking definition every time.
Step 1: Prep Your Skin
Start with a moisturized and primed face. A smooth canvas ensures the contour glides on evenly. Apply your foundation and concealer as usual, then set with a light dusting of translucent powder if using powder contour. For cream or liquid formulas, skip the powder on areas you will contour.
Step 2: Identify Your Contour Zones
Using a flat contour brush, you will target three main areas:
- Cheekbones: Suck in your cheeks to find the hollow, then draw a line from the top of your ear toward the corner of your mouth.
- Jawline: Trace along the bone from your chin to your earlobe to soften a round face or add definition.
- Nose: Use the flat edge of the brush to draw two thin lines down the sides of your nose, then blend.
Step 3: Apply Product with Precision
Dip the flat contour brush into your contour product—cream, powder, or liquid. Tap off excess to avoid harsh lines. Starting at the ear, place the brush flat against the skin and drag it along the hollow of the cheek in one smooth motion. For the jawline, hold the brush at a 45-degree angle and sweep from chin to ear. For the nose, use the tip of the brush for narrow lines.
Step 4: Blend, Blend, Blend
After applying, use a clean, fluffy blending brush or a damp beauty sponge to soften the edges. The key is to blend only the edges while keeping the center of the contour line intact. This creates a shadow effect that looks natural.
Step 5: Set and Highlight
Set your contour with a translucent powder if you used cream products. Then, apply a highlighter on the high points of your face—cheekbones, brow bone, cupid’s bow—to enhance the contrast. The combination of contour and highlight is what gives a truly sculpted look.
Mastering Cream Contour with a Flat Brush
Cream contour is popular for its blendable, skin-like finish. But it can be tricky if you use the wrong brush. A flat contour brush with synthetic bristles, like those found in the Ready, Set, Pro 16-Piece Face & Eye Brush Set, is ideal because it doesn’t absorb the product. Instead, it glides the cream over your skin. To avoid a muddy look, work in small sections and blend each area before moving to the next. For a chiseled effect, use the flat side of the brush to lay down a thick stripe, then feather out the edges with a stippling motion.
Mastering Powder Contour with a Flat Brush
Powder contour is great for oily skin and long-wear events. Use a flat contour brush that is firm but not stiff. Dip the brush into a matte contour powder, tap off excess, and apply with a light hand. Because powder is more pigmented, it’s easier to build up than to remove. Start with a light swipe and add more as needed. A flat brush helps you place the powder precisely on the hollows, avoiding the mistake of contouring too low on the cheek.
Common Mistakes to Avoid
- Using too much product: Start with a small amount—you can always add more.
- Blending too much: Over-blending can make your contour disappear. Focus on softening edges only.
- Wrong placement: Contour should sit under your natural bone structure, not on the apples of your cheeks.
- Ignoring your face shape: Round faces benefit from contour on the sides and temples; square faces need contour on the jawline corners; heart-shaped faces should focus on the forehead and chin.
Why a Flat Contour Brush Is a Game-Changer for Your Kit
Investing in a quality flat contour brush is one of the best decisions you can make for your makeup routine. It offers the precision that fluffy brushes simply cannot provide, allowing you to sculpt with confidence. For those who love a defined, Instagram-worthy look, this brush is essential. And if you are building your brush collection, consider a set that includes a flat contour brush along with other face and eye tools.
Recommended Products from MORPHE
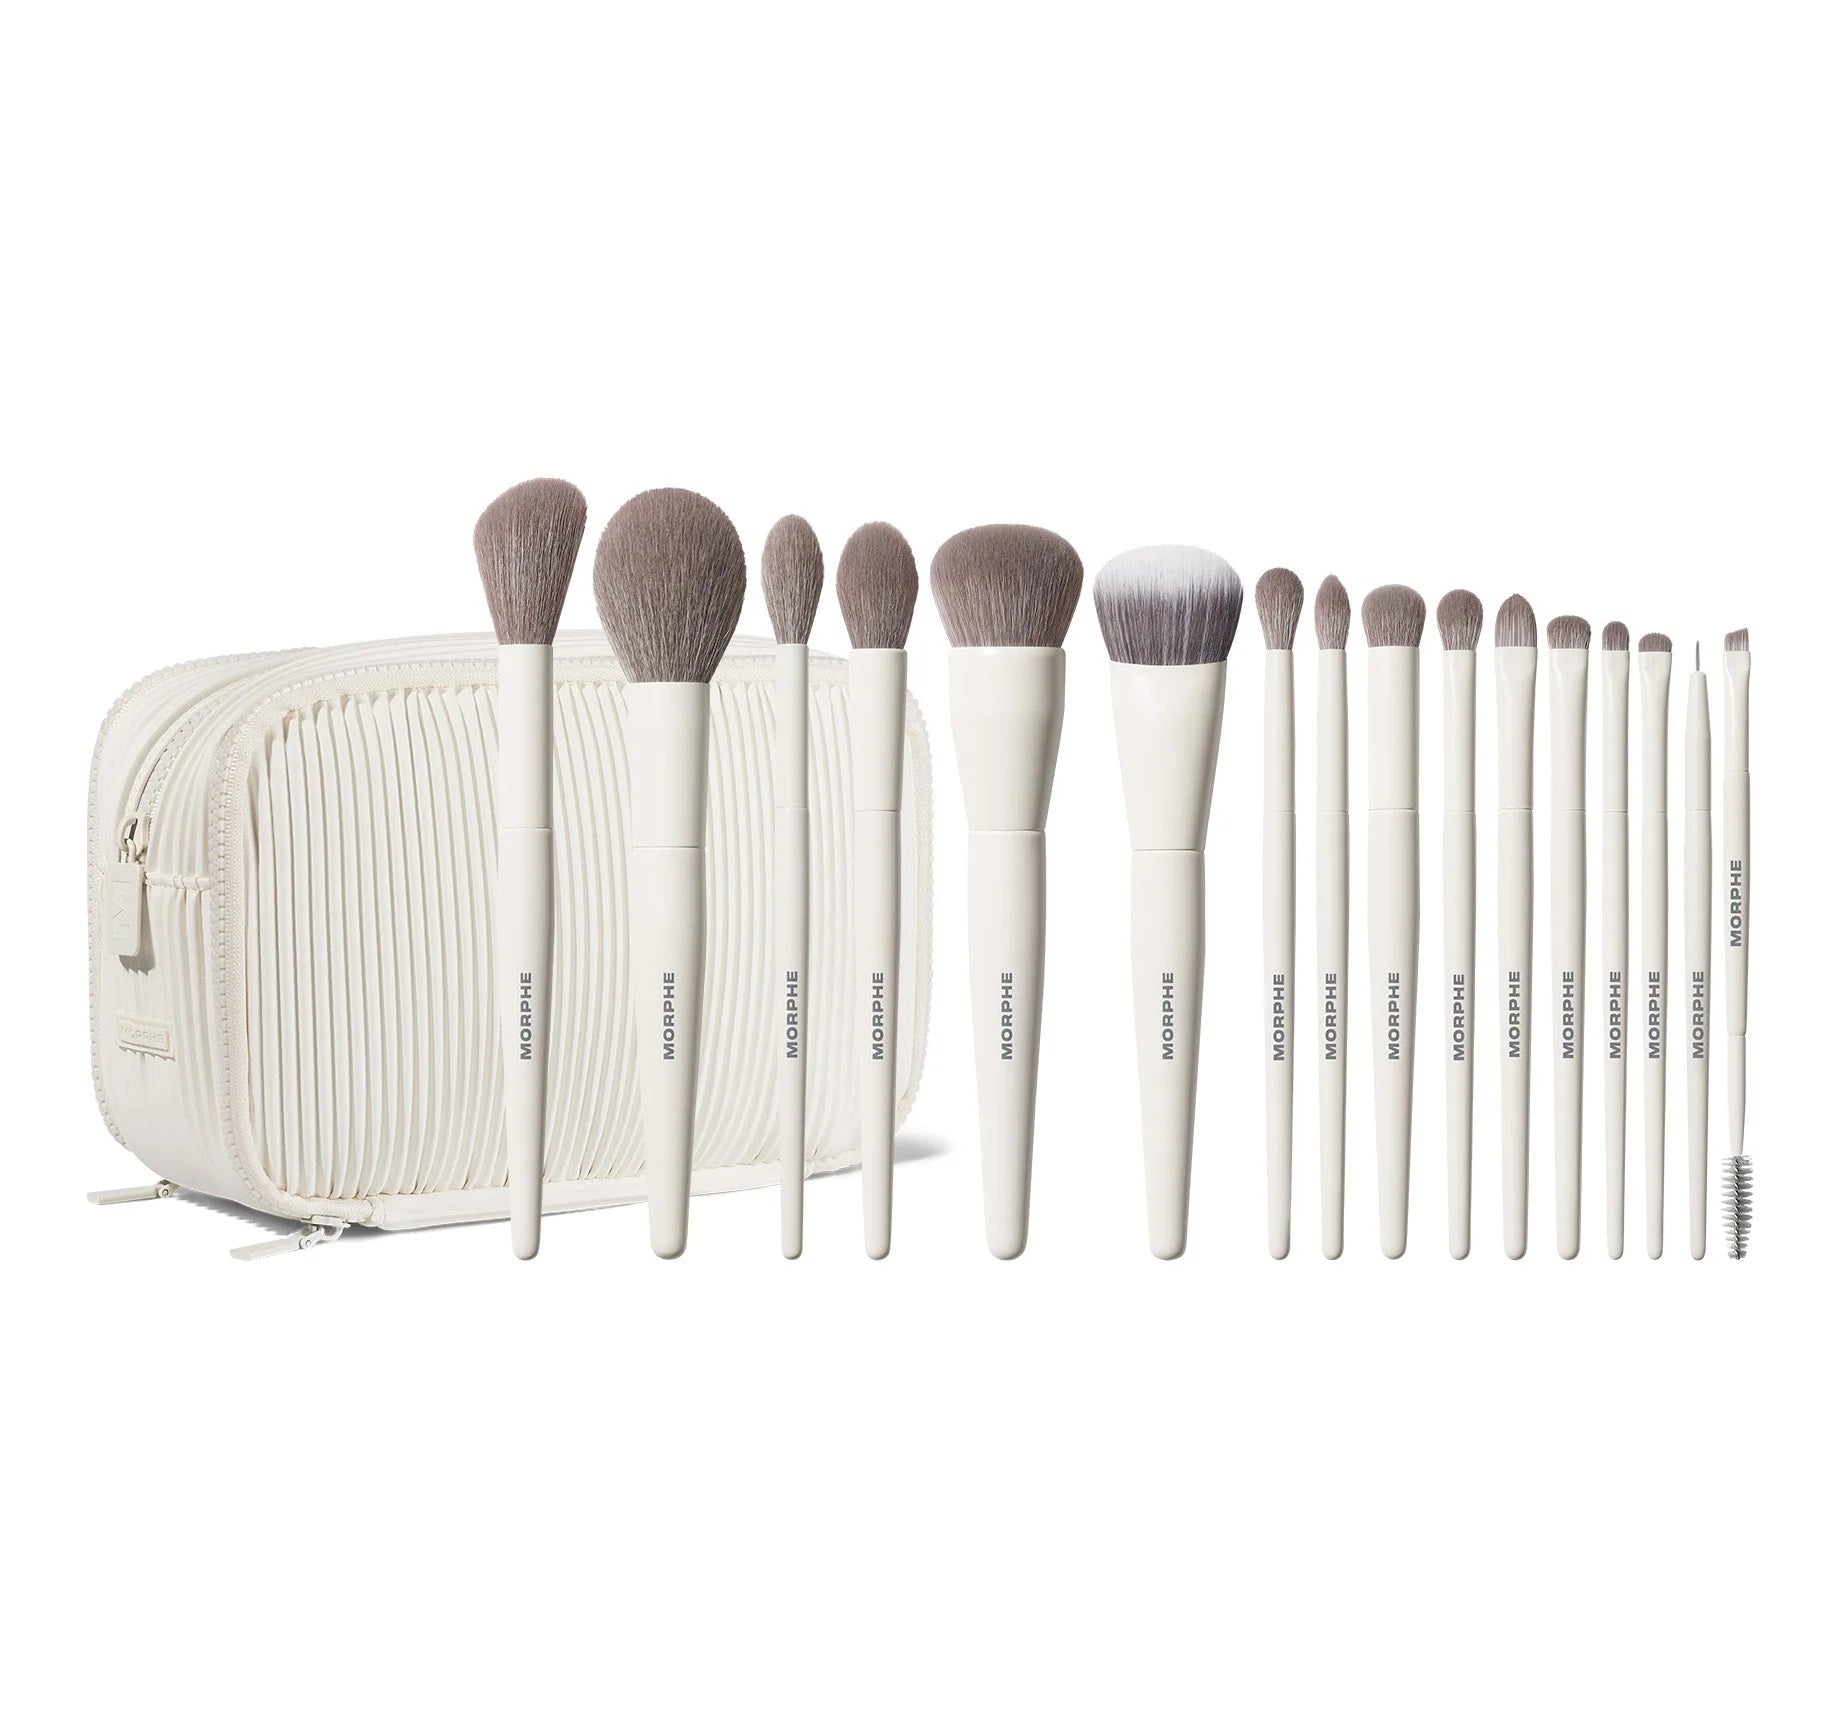
MORPHE offers a range of brushes and tools that make contouring effortless. The Ready, Set, Pro 16-Piece Face & Eye Brush Set includes a flat contour brush perfect for precise application, along with blending brushes for a seamless finish. For those who prefer a dual-purpose tool, the M105 Large Domed Foundation & Body Brush can be used for contouring larger areas like the jawline or décolletage with its soft, dense bristles. Pair your brush with a high-quality contour product to maximize your sculpting potential.
Final Tips for Flawless Contouring
- Always use a light hand—build intensity gradually.
- Clean your brushes regularly to prevent product buildup and breakouts.
- Practice on your hand first to get a feel for how much product the brush picks up.
- Remember that contour should mimic natural shadows, so look at your face in natural light to check your work.
With the right technique and tools, you can achieve a sculpted look that enhances your features without looking heavy or unnatural. The flat contour brush is your secret weapon for precision and control. Ready to elevate your contouring game? Explore the Ready, Set, Pro 16-Piece Face & Eye Brush Set and discover how the perfect brush can transform your makeup routine.